We kind of all know where to put the light by now, at least mostly. Well, some of the time, anyway. Basic lighting info is all over the internet, some of it good, some of it bad or just indifferent. It’s pretty ubiquitous, to the point of being monotonous, such as the axiom of “If you move the light closer to your subject it will appear softer.” There’s so much of this out there you might actually begin to think it’s important, like the kind of important that shows up on the nightly newscast.
“Earlier today it was reported that a man with a flash into an umbrella was evidently using that umbrella more than ten feet from a bride and groom. Police are still searching for this man and have set up a hot line….”
A much more interesting question is of course, how do you find a picture, and once that picture is potentially sorted out, how do you then explain, elucidate or otherwise illuminate said photo so that it makes sense to someone who wasn’t there finding it with you. The viewer of the photo, in other words. The reader of the magazine, or blog, or website. Your customer. That’s kind of what my new tour with the KelbyOne group is about. I’m discussing the thought process of light instead of the mechanics of it.
Questions about f-stops and shutter speeds and Group A, Channel 1 are still important and worthwhile to be sure, but once you have your head wrapped around those items, they should be shunted into a program running on background in your head. The active program on the desktop of your eyes has to be what you see and how you interpret what you see. Which speaks to the issue of lighting what you see.
So, lately, in most instances, when I’ve been teaching, I’m emphasizing more and more the importance of finding the picture. The lighting is important, to be sure. But if you see it well, right out of the gate, before the flashes even come out of the trunk of the car, the light will come.
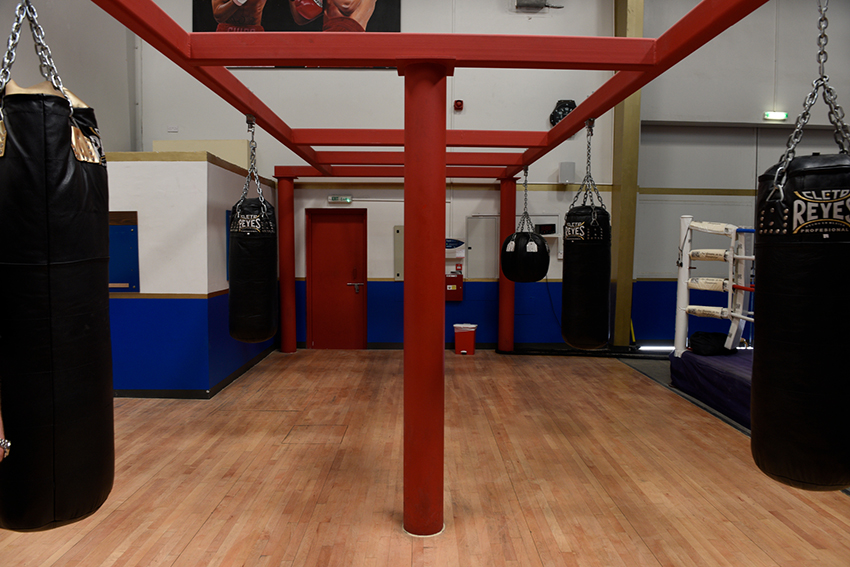
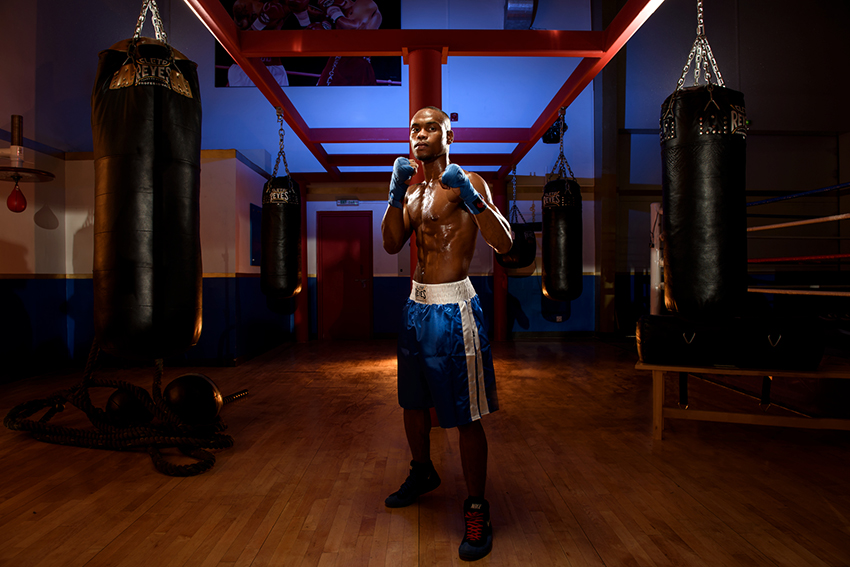
First, find the angle. Find something that means something, has good dynamic impact, conveys good information, or just looks cool. Below, I sorted out a frame in a boxing gym. It’s got the bags, so you know where you are. The red ribbing of the supports is a plus. Take a look. Slow down. Make an ambient light photo. Establish the frame. This just might be the frame for the action of the photo that you will have to live with for the whole shoot. Time being compressed on location, once you place your bet, you often times gotta stick with it. So, this is a crucial, simple step.
Also, with all these lines, tripod is called for. That way this scene stays steady as you start to light within it. Tripod of choice, Gitzo. Camera is D4S, lens, 14-24mm f2.8.
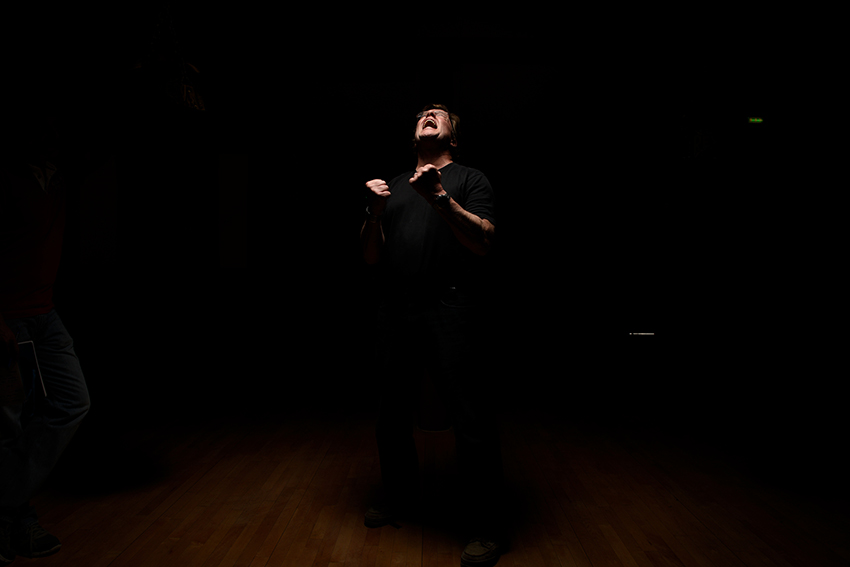
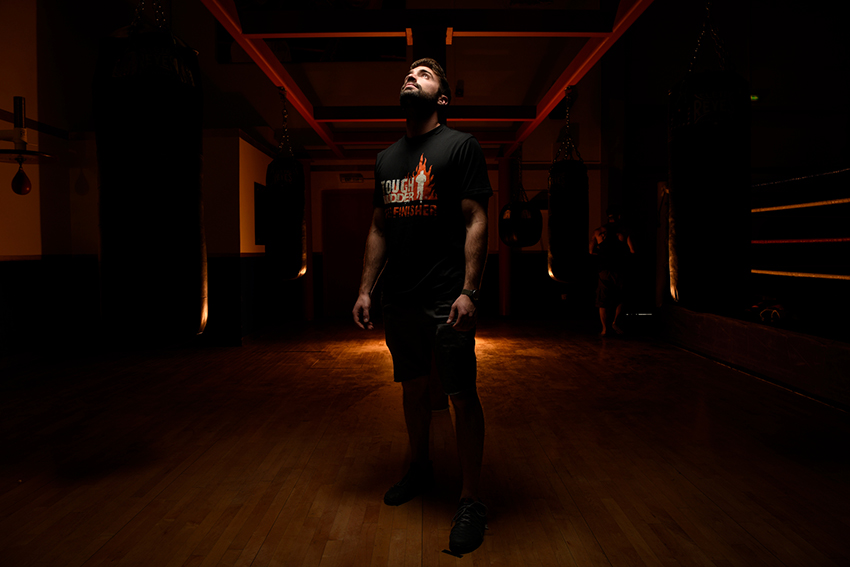
Next, get control. Get rid of the ambient light and start by playing with the look and feel of a main light. In this instance it is the Lastolite Ezy-Box hot shoe soft box, the 24 incher, fitted with an egg crate. I’m standing under it, alone in the darkness, howling at the pixels, fists clenched, shaking with rage at the immutability and unforgiving nature of light, shadow, flash duration and the digital sensor. Actually, it’s just a light test, and I’m goofing around.
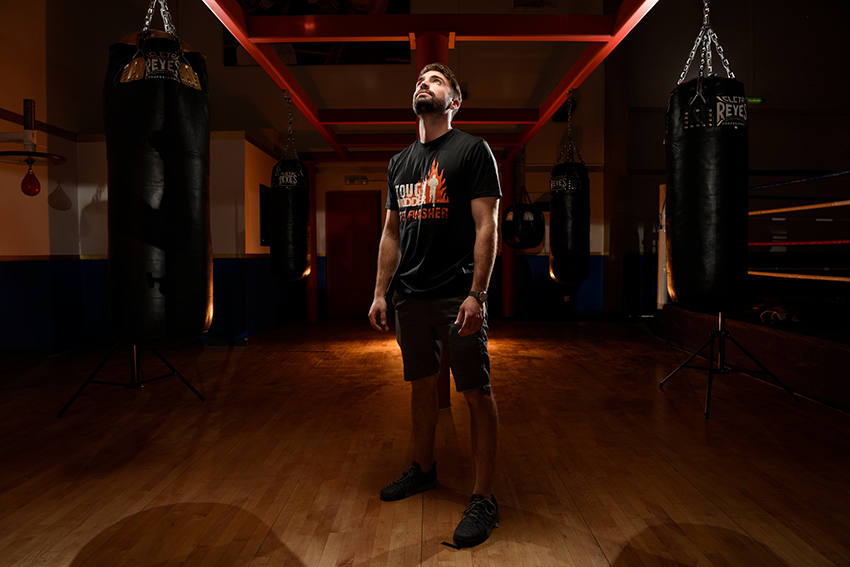
Next, establish some context, which can mean lighting some area of the background. This is a Group C, SB 910 speed light, tucked away on a short stand, firing at the floor. A little splash of drama, if you please!
Not pleased with the lack of color. Add a CTO gel to the aforementioned light.
Rim lights for an action hero! A boxer is almost always an athletic, daring, dramatic figure. Lighting up his or her edges tends to be a tried and true means of separating them from the darkness of a background, and lighting their physiques in a cool way.
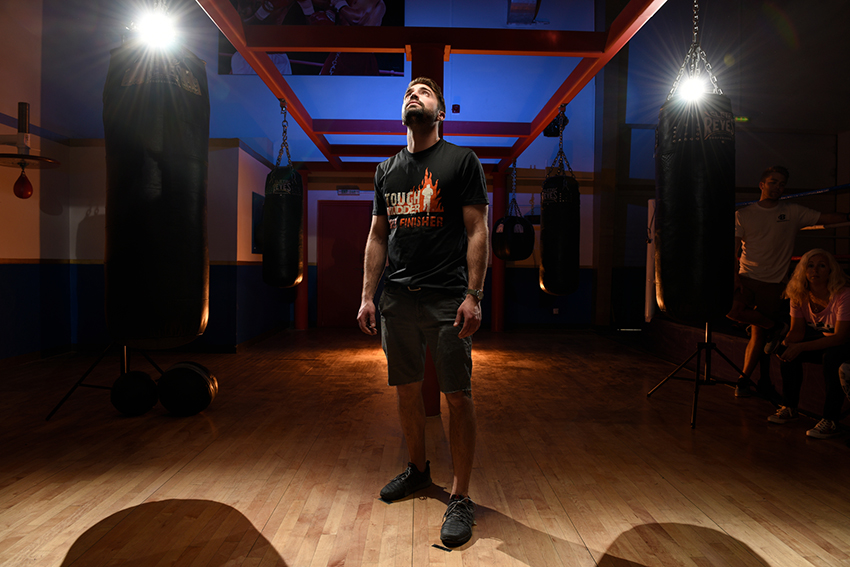
Aargh! The pain of unfettered rim lights being hid in impromptu fashion by heavy bags. Took some time to get them placed right, so they A) lit the boxer and B) didn’t give me screwy, noticeable shadows in the foreground. This was really a matter of sliding the lights up and down on the stands, and testing, re-testing, re-testing.
Now, my stands are directly below the bags and are visible. Being Manfrotto stackers, they are black and thus not too overt, and someone good at Photoshop could blink them out while eating toast and drinking coffee. Me, I just threw some gym/boxing stuff in front of them to obscure the nature of the supports. I do this a lot, actually. Find semi-appropriate stuff in the environment and use it to obscure the lighting supports.
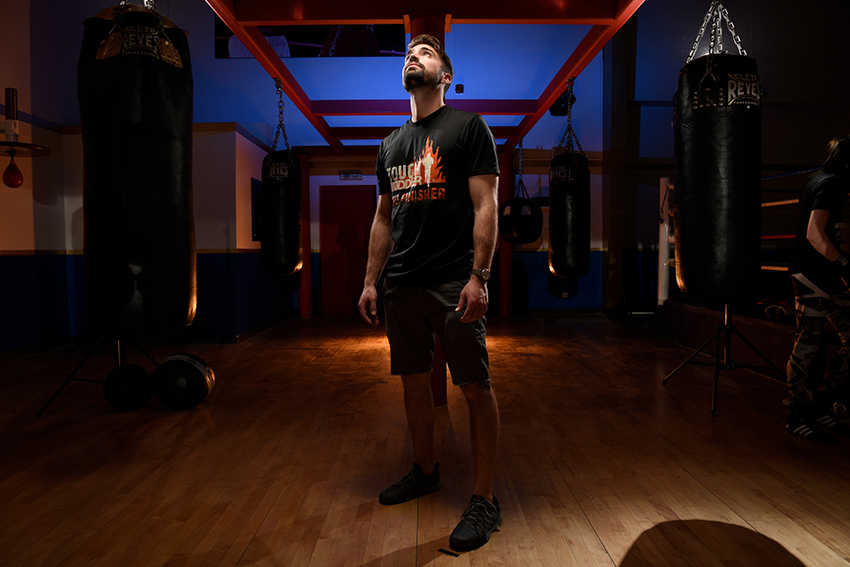
Also, the background was looking dim. So I threw another light back there to light the wall. Given the CTO warm tone off the floor, I used blue for the wall, figuring I’d get a little pleasing vibrational effect. Look at the level, tone it down.
Black bag on camera left was disappearing, just a tad too much. So I banged a CTO gelled speed light off the wall and hoped for the best. Fussed with it a bit, and got it to a reasonable place where it produced a highlight that is not a HIGHLIGHT. This was actually a fourth group if you will, as my main is Group A, my rims are Group B, and my background is Group C. So I slid this puppy into Group B and it seemed to like the power level. That’s the thing about having three groups to control. If you need to go beyond that, you have to hope your “fourth group” works well in the already determined power level for that set of flashes.
(One thing you can do, is make a single group manual. Just the one group where you are asking the flashes to light different sections of the photo and you want some variance to their power levels. For instance, Groups A and C are working out just fine with a single, TTL directive. But, you are asking Group B to, essentially, multi-task. That group can be thrown into manual, and feathering the lights to different power levels can be accomplished with neutral density gels. That’s really old school, but it works. Lots of ways of going about a photo shoot.)
If that had not worked out, I would have had to go with manual power on everything, gotten out of TTL mode, and thus lost push button ratio control at the camera. Which would have meant I would have had to get up and walk around the set pushing buttons. Instead I remained comfortably seated at the camera, merrily instructing the groups to sing and dance from the commander flash.
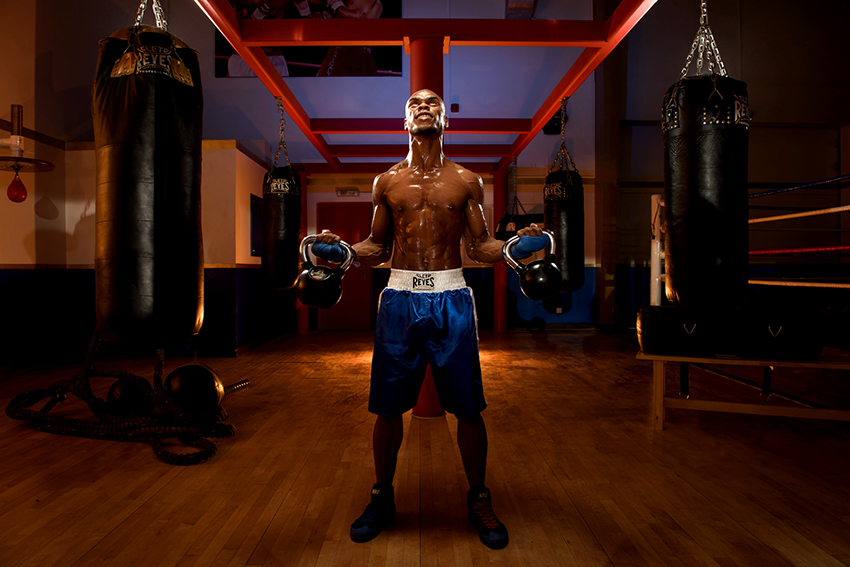
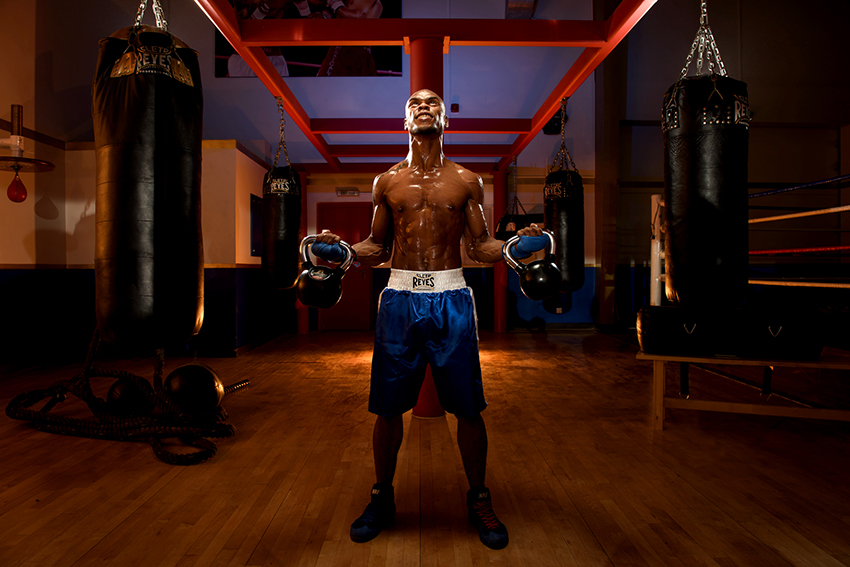
Now, introduce talent! Talent that’s been oiled up and sprayed with water!
Talent that is screaming while lifting heavy objects! Objects that just by luck have silver handles which pick up backlight well!
Lighting and talking my way through this took a bit less than an hour, with a total of six speed lights in the field. Each light has a specific job to do, within the frame. But establishing that frame remains the single most important thing. It’s the stage. They then become the players.
Gear used is pretty straightforward for all this. In fact, there is only one light with a light shaper. Everything else is just a raw light, banged or bounced around on the set. All the bits and pieces are hot linked, but further questions, head over to jsnyder@adorama.com, my camera consigliere!
More tk….





Joe & team, thank you so much for another inspiring behind-the-scenes story.
Learning about your thought process as you build the picture and solve problems is invaluable – and, in my opinion, a lot more insightful than the purely technical aspects.
Thanks again for your generosity sharing your expertise and wisdom!
Warm regards,
Didier.
You’re always an inspiration
Your building blocks approach makes the whole process much simpler to understand. Thank you, Joe.
Joe,
Thanks for mentioning the unsung hero in lighting that is most often overlooked- the stable tripod. Without this tool, both lighting and composition suffer and oftentimes fail. I find pre-visualization more easily realized when the camera, and the compositional lines don’t move while you are realizing your vision technically.
Also great that you remind us all that the photo is in your heart and mind first, and then only accomplished with gear. I keep missing you at the Over Flasher’s Anonymous meetings lately, but know you are struggling mightily with your add a speedlight addiction as well as you can.
Ever higher,
Christopher
Loved this entry Joe. I’m planning an on location photo shoot at a martial arts club and this has really got me excited and has the creative juices flowing. Love all your stuff and I don’t hesitate to state that you have been a source of inspiration to me
You are really inspirational.
Your use of color is inspiring. I always forget that option. I’m also inspired by the way you cut out the photoshop element of the shoot just because.
Fantastic (as always). How did you fly that Ezy-Box out over your subject? Boom stand? Magic arm and clamp from that steel grid? Hovering drone?
Thanks!
Sweet setup as always!
I kept scrolling down, waiting for the Numnuts Diagram. 🙂
Great, eye-opening walkthrough. I love comparing the bare gym to the finished one just to see how drastically lighting can change a location.
Upon first glance of the scene I would have discounted the location as a pole would have been growing out of the subject’s head, but you as the master you are, were able to work the light to your advantage and make it a visual accent. That my friend is a true gift of your artistry. Thanks for sharing. Now it’s time to bring your tour to the Dallas / Fort Worth Area….please.
Beautiful.
I thought you were auditioning for Terry Malloy.
Great, great stuff. You are definitely my photo-lighting guru 🙂
One word? Respect!
Thank you for the generosity of sharing.
Hey Joe,
Where did you put the Blue Light to light the back wall ceiling??? And did you boom the EZ-Box or did you have some place to clamp it above??? Great stuff as usual and thank you for taking the time to put this together.
Oh, truly wonderful lighting !!!
You make it sound so easy and intuitive that I feel like a total dumbass, I don´t think I would ever be able to set-up a scene like this. Great work as always.
One of the things that sets you apart is the way you tell a story – funny yet very informative. I just want to keep reading.
Looking forward to attending one of your classes.
Hi Scott…the ezy box is on an Avenger C-stand….extended up over camera and over the boxing supports. The blue gelled light is in the back of the set, behind the last girder support, I believe, firing up into the far wall….all best, joe
My whole flash work is Joe’s inspiration. I have watched every video (almost) available on youtube I also won his DVD video “Language of Light” when he was in Dubai for the GPP 😀 .
The best thing i learn from him …. actually 2 of them ….. he taught me by using his videos how to build up an image brick by brick …. flash by flash …. and of course the most completed “Stroboscopic” took me a whole year to understand how to configure the flash and how it works …. when Joe was in the GPP 2013 i finally able to learn from him and since then … its a piece of cake. 🙂
We are truly bless that we have him as a story teller who uses people … colours and scene and blend them together to make the story out of them.
Thanks Joe for making stunning images …. god bless you Sir
Nice work as always.
Many thanks for the kind words Babar! Our paths will hopefully cross again….joe
Mr. Joe
You are quite the Craftsman. Like a builder of a house, you start with a solid foundation (the framing) , then add the rest slowly, step by step. The biggest difference is that you are also the Architect and the plans are in you mind!! Oh, and you do not have to take out a building permit!!!
Good Job!!
This is a really great example and explanation thank you. I can not recommend enough Joe’s “Language of Light” Vol 2 and Vol 1. They are filled with “how I did this” demonstrations. Very well produced and explained. Terrific.
A great post, thanks for taking the time to explain your process. One thing I’m still unclear on is how you eliminated the shadows in the foreground from the hanging bags.
Hi Whit…just continuous up and down adjustment and feathering of the lights. Speed lights don’t have effective model lights, so you have go by trial and error….Joe
Very good pictures. Respect for you.
you had it then. you have it now. thank you for another insight.
Always great to see “under the iceberg.” Thank you Joe for giving us a behind the scenes look at your thought process and lighting genius. Excellent read.
Perfect! Thanks for this perfect behind-the-scenes story.
Impresionante su manera de iluminar sus fotografias! saludos desde Venezuela
How did you get the light above him? Boomed? Or clamped on to a rafter?