I say this. Everybody says this, when it comes to lighting a photograph. “Get your main light done first!” Make sure you get that lead light, the flash that makes the statement, done first and done right. That light, big or small, announces, characterizes, beautifies, polishes up, and declares your subject as the rock star of the photo. One hopes for this, anyway. It is generally up front and at the center of the action, in the foreground. And, quite naturally, that’s the light you work on first, as it anchors the photo.
But every once in while, it makes sense to build a photo from the back to the front. I showed this recently at an Adorama sponsored workshop at the Tribeca Skyline Studios in downtown Manhattan. We had an amazing couple of days, with five sets rocking and rolling all day, big and small flash, beautiful, charismatic models, and the lessons of light bouncing all over the place. I did demos in the morning, then folks shot on their own, and then I closed each day with another quick (very quick) demo before everybody went downstairs to greet the NYC rush hour.
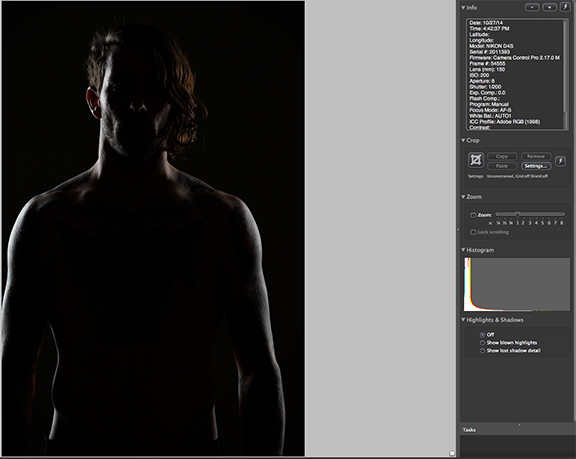
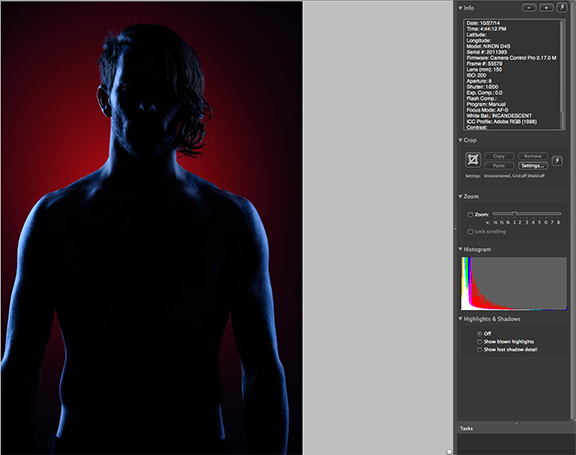
We had James Gallagher on the set, which was a truly fortunate event, as he has great presence in front of the camera. I didn’t really know exactly where I was going with this when I started, but there’s been many a lighting grid I’ve started with the old, “It seemed like a good idea at the time,” kind of a shrug and a bash on regardless mentality. Pursuant to this, I thought two Profoto 1×6 strip soft boxes, fitted with D1 packs, were a good idea. As you can see my first frame is not promising. But I started this way, because I guess I had symmetry in mind, and I wanted to get the rim lights even. And when they’re the only lights in the photo, and all else is dark, it’s easy to pick up on your screw ups.
One’s too dim, one’s too bright and they’re not placed all that well. First frame, 4:41. Quickly adjust.
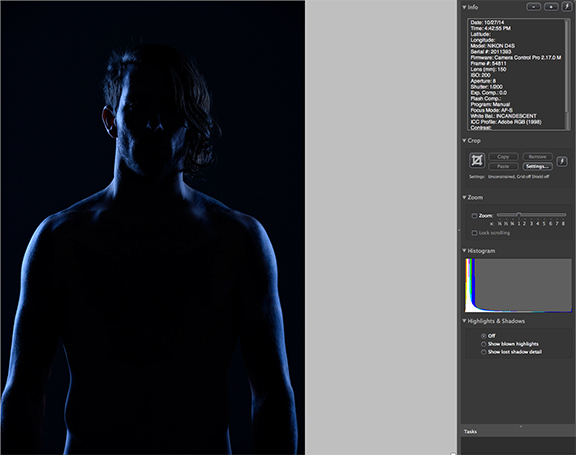
Better placement, left is still a bit hotter than camera right light.
Go to incandescent, turns them blue. (The flashes are ungelled.) Still a bit brighter, camera left. Hello Joe, you do see it’s a bit too bright, don’t you?
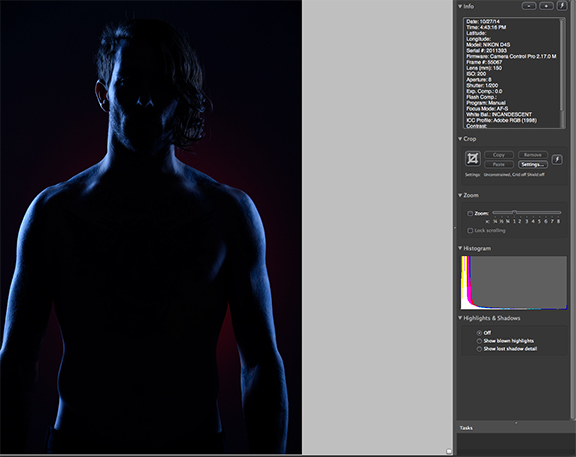
Add background, a Profoto B1 with red gel, and ten degree honeycomb grid. Too weak.
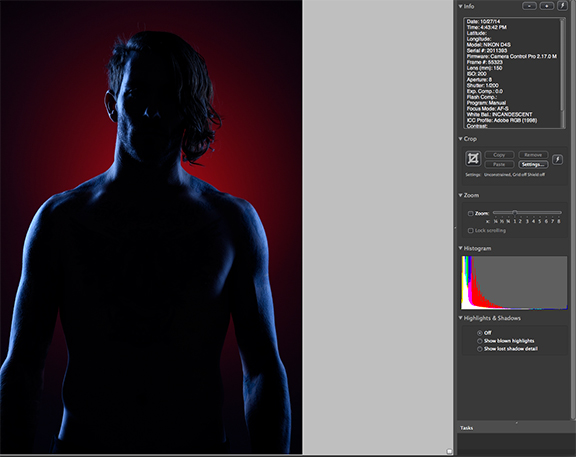
Power it up. Looks good, but slightly off to the right.
Reposition, get the glow centered behind James. Still forgetting about the camera left blue highlight being too strong. Sigh.
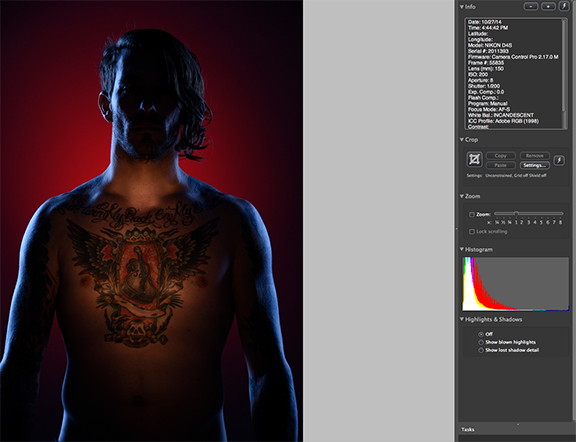
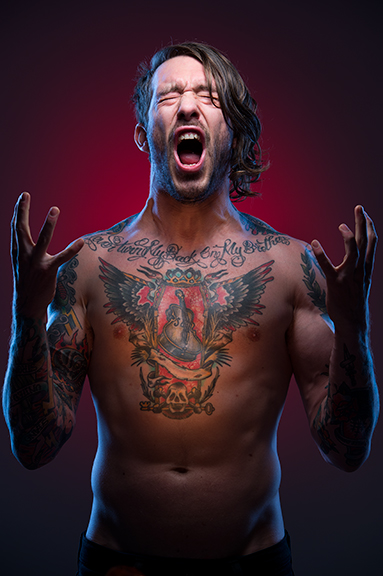
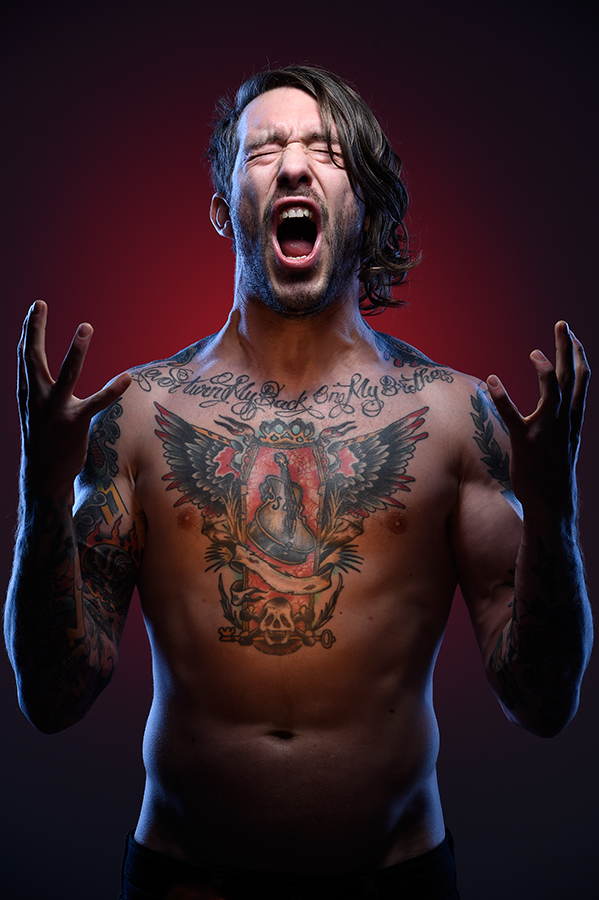
Add double gelled (for warmth) Profoto B1 with five degree spot grid. Bang that into literally the heart of the matter, the amazing tattoo James has on his chest.
Add Lastolite speed light box overhead on an Avenger c-stand, running on manual slave mode. (SB-910, running on SU-4 mode.) Too normally placed, and too far away, it bleaches out the warm highlight on the chest. It also is gelled, but just with one full cut of CTO, bringing it back to a “normal” or white light condition in response to the incandescent WB.
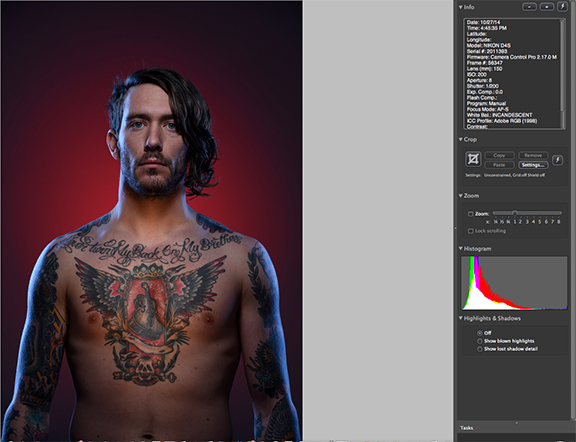
Reposition the speed light box much closer to James, and ask him to angle his head up into it. The closeness and steep angle combine to limit the spread of the box so the warm highlight retains a good amount of intensity. The position of his face, slightly up and into the light, is important.
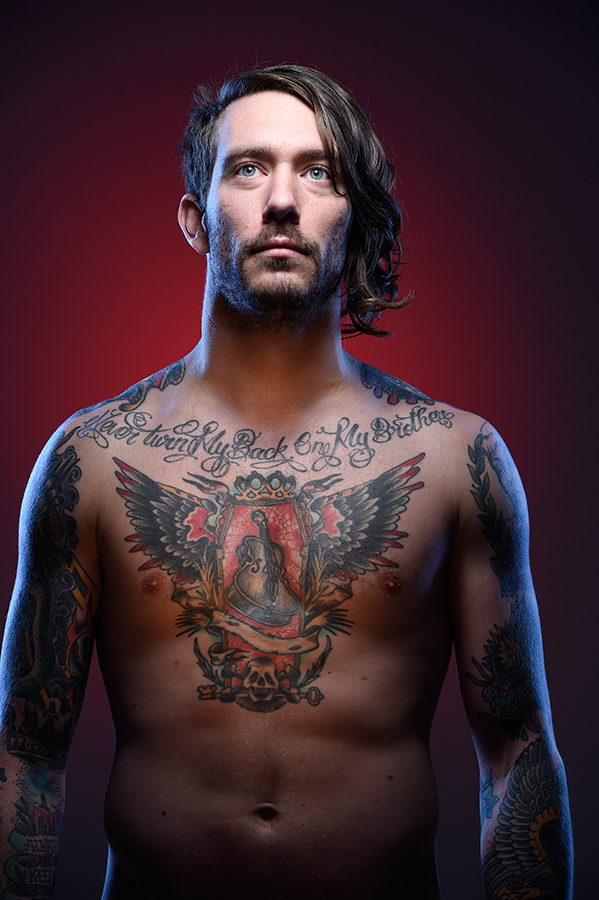
Add some intensity of expression. First frame off. Ask him to open hands and try to remember how to compose with some measure of spacing and reasonable framing.
Shot I liked. Second frame. Done. 4:49. On the frame above, I did a little saturation, and a bit of burning and dodging. Below is same pic, jpeg out of the camera.
I never did anything about the slightly hotter blue. Next time, maybe. But almost assuredly, I’ll forget something else. It’s just the way of location light, especially when you’re moving fast. Now I had Jon and Cali with me on this, moving the lights. We had a 5pm scram time, and I had 50 people I was talking to about doing this while I was shooting and the pix were going up on the screen. So, yes, when you gotta move fast, there’s no substitute for a knowledgeable crew working with you. Many thanks to them.
And thanks to all the folks who came to the studio lighting workshops! And to Adorama, who staged them. They were so well received, I have a feeling we’ll do it again one of these days. And to our wonderful, patient models, thank you! You guys were a great and beautiful crew to work with–James Gallagher, Kaydence Frank, Sharinna Allen, Alexandra Martignette, and Anthez Williams. Makeup by Bethany Serpico, and Anna J. Bearman. Huge thank you to Seth Miranda, who is a terrific shooter, and creates special effects characters portraits like no one else. He helped us all weekend, and arranged for the special effects makeup we had on the set, which was a big hit with all the photogs who participated.
More tk….







Joe – this was the perfect way to end a great day with everyone at Tribeca Skylight Studios. Weeks later, I am still in the afterglow and applying what you demonstrated. Many thanks for a fabulous day!
Always fun working under pressure and having a great team behind you! You might want to mention there is a single cut CTO on the Lastolite speed light box overhead to neutralize the tungsten shift (I’m assuming as the strips are blue and ungelled). Those learning from your quick buildup might get lost in that fact.
Good catch Peter…important to note that….I’ll update….thanks…Joe
Love this how it was done type of post. Really inspiring.
Thanks Joe
This was a great workshop and an awesome way to spend a day. Seeing this shot assembled piece by piece live and worked out in real time was very instructive – and inspiring to see a great shot take form in just a few minutes.
Thanks Joe for sharing your expertise and experience (as always), and of course to all the crew, models, and support staff that helped pull so many elements together for a jam-packed day of learning and fun.
Highly recommended and would definitely encourage anybody to jump at the opportunity to attend one of Joe’s workshops!
-Jay
Hi Joe
Like everything you do, your workshop and photographs were spectacular. Learning by doing was a great experience.
You are magic with a camera and lights.
Thank you, Joe and Annie!
Julie
What was your trigger? It looks like 1/1000th
Not sure what you mean. Exp was 1/200th @ f8
textbook “Joe”!!!! Gets it right in camera and in a fraction of time compared to the rest of us. Truly a gift. Bought your books and attended your seminars. Still totally amazed.
Hi Joe,
Thanks for the post.
I love these kinds of walkthroughs with lots of useful information.
Keep up the good work!
Daniel
Very interesting and very effective way of your demonstration… pic by pic ..
i am very beginner in this field.
Hope i will learn from you … alot.
Hassaan Ali Khan
Fantastic work!! I’m big big fan from Brazil, your work is a great inspiration for me.
Regards from Rio,
Elias Moreira
Joe,
Thanks for the description of how you lit this. Many thanks.
AMAZING shot-build, breathless.
Just found out Christmas is coming early for me, I’ve got a place to see Joe in action in London at the end of the month. Joe, I can’t believe your schedule, maybe you could take a break from the almost priceless “lighting discussions” and explain how you manage to fit all this into your life! Does Annie have a blog?
See you soon.
Chris
You hit the spot with that one, out of 5, light Joe!!!
I did something similar recently, but apart of hitting the spot, with the grid light, on his t-shirt I also wanted to enhance the effect of the window pattern shadow. Here you can see it…. and I end up using 6 speedlights and they were Canon, really sorry about this 😉
https://www.facebook.com/267538939972744/photos/a.269970153062956.68948.267538939972744/809718385754794/?type=1&theater
Hello Joe, I really love your work. Especially the creativity behind your photographs and the build up. Just want to say thanks for the little little tips here and there. Hope to meet you some day.