Generally, when I teach a large group in a seminar setting, I involve the audience in as many ways as I can. They become my photo subjects, all day, for one thing. In other instances, I pass (or throw, if someone looks like a good bet to catch it) a speed light out there so that some luckless soul then becomes a VAL (voice activated light stand).
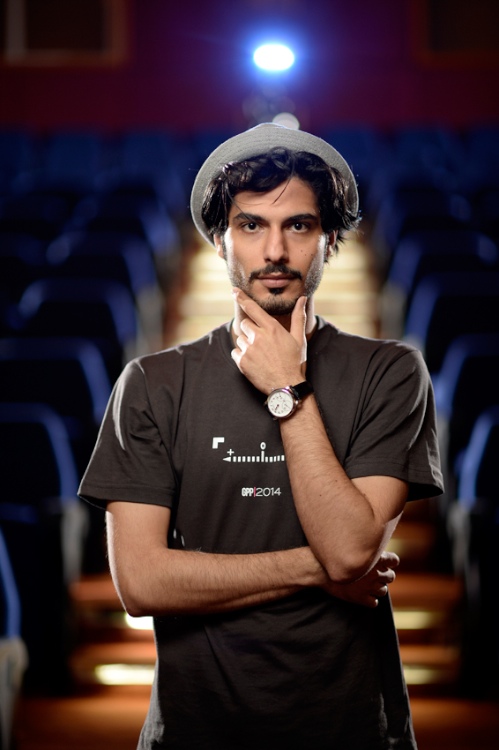
At the recent GPP event in Dubai, we posed the intrepid Ali, and imagined him as a young auteur director of indie films who was ginning up a reputation in the Middle East and beyond.
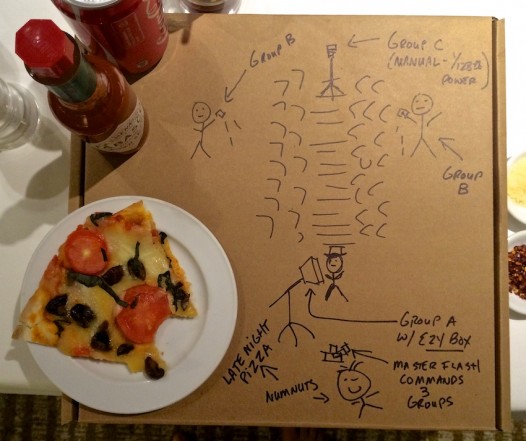
First step, as always, is forget about the flash and the light, and compose the picture. Get control of the scene. The obvious thing to do in that auditorium was to use the center aisle, with glow strips set into the steps, as a compositional element. Once the subject is settled into a reasonable place in the frame, the main light is placed, which in this instance is the Lastolite 2×2 EzyBox soft box, white interior style. It is placed up and to camera left, in sort of standard, regulation soft box position. It does hover at the upper edge of my frame, as I want it low enough to scoop light into Ali’s eyes.
Next are the audience held kicker lights, placed to either side and behind my subject at about 45 degrees. These lights are ungelled, and hand held. (Hmmm…last sentence, beginnings of a rap song about speed lights?)
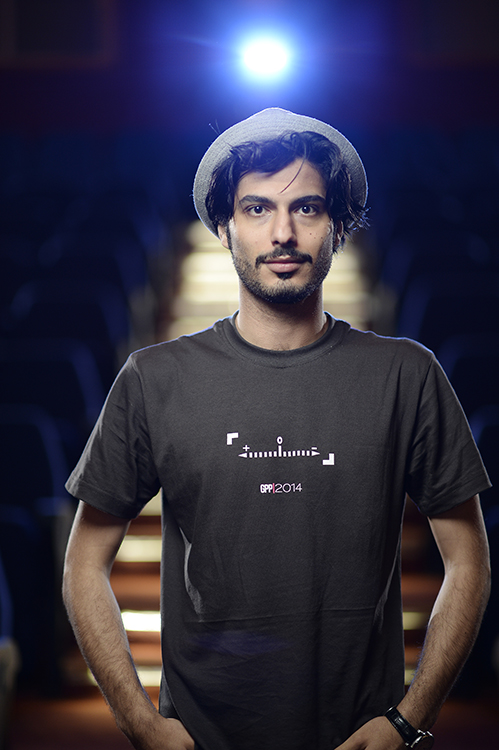
I digress. Those two lights simply rim his face and form, and define him. The corollary benefit, which to me was a happy accident, is that they also rim lit those auditorium chairs behind him, which have a rich blue color. You do have to be careful how those rim lights are aimed and zoomed. If they go too tight, and too forward looking, you lose the chairs, as in the frame below. Their position, angle, and zoom factor all bear experimentation.
Last step was to place our simulated projector behind him, which was another speed light, Group C, fixed up with a blue gel. (No smoke machine handy. Rats!) Remember in TTLville when you have the actual speed light in the frame, it effectively is blasting into the lens, and thus the camera’s brain, and it can easily go kaflooey. (That’s a technical term.) It will report on itself as being a very bright source, and thus power itself way down, most likely to a level where it’s barely discernible. When you have a backlight like this, in a position that is clearly visible to the lens, best to slam that puppy into manual mode immediately, and tell it how to behave from the get go.
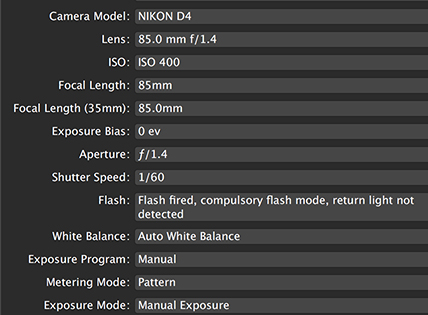
When all these pieces are in play, you can then factor them and play with their ratios, relative to your camera settings. In this instance, I chose f1.4, so the background doesn’t get to be too much of a player, and remains just soft context. Here are the final settings. As always, the ambient light level was the driver. I needed the background auditorium to go relatively black, but did want the glow strips on the steps to radiate into the picture. 1/60th @ f1.4 was a good combo for that.
Below are the flash settings as recorded in the metadata.
Group A: TTL, -1.0EV (Camera: 0EV, Speedlight: -1.0EV)
Group B: TTL, -1.0EV (Camera: 0EV, Speedlight: -1.0EV)
Group C: M x 1/128 Device: SB-910
All flashes are SB-910 units, with no shapers except the main light. Camera was a D4, fitted with an 85mm f1.4 lens.
It’s a fun way to teach in that everyone gets involved, and sees the result built one flash at a time. It never becomes a fully finished picture, as you shoot a few frames and move on, but it does open some doors and solve some mysteries, such as how to tackle an extremely large, dark room with a few speed lights. We repeated the experiment at PhotoShop World in Atlanta, in an even bigger, darker cavern of a convention center, with the ebullient, charismatic wedding shooter Jason Groupp as our subject. He was great, and very patient with my bumbling about.
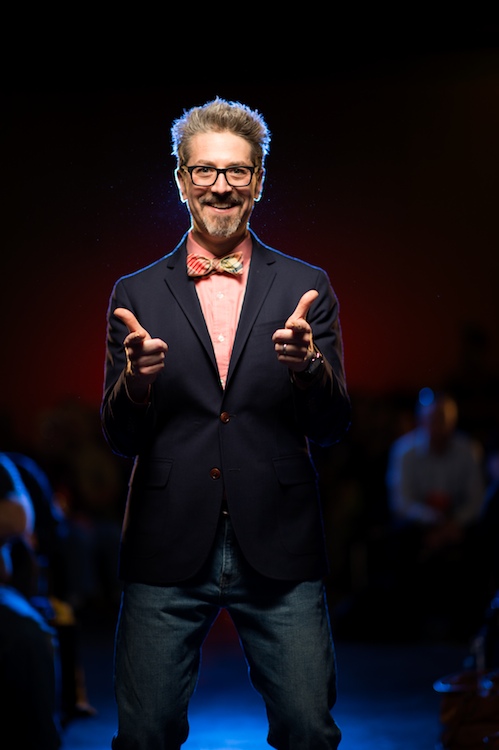
The below are the same basics, really, with the additional kicker of another speed light (why not:-))) with a red gel aimed at the far, far back wall. And instead of seeing the blue backlight, this time it slams into my subject, giving him a bluish rim. (Jason’s hair was perfect for that light!) And the 45 degree rims have warm gels on them. Variations on a theme. Thanks to Jason for jumping in as our subject!
More tk…



Always the best lighting techniques. Great stuff!
Really enjoyed the breakdown, thanks for sharing Joe. Looks like it was a lot of fun.
A great work with fhashs. I like to know about the speed light and gels.
Perfectly done shots and very informative explanation. Thanks, Joe!
Ya know they’re making another Steve Jobs biopic – Ali is the spitting image of young Steve in his thoughtful, contemplative pose…
First picture is alright, but not well centred for a bullseye shot, the 2nd picture has terrible rim lighting in the hair, really distracting and takes away from the picture rather than adding it.
Lighting with the stars.
beautiful article and really useful..love the way u explain things 🙂
Another series of great portraits. It all looks so easy when you flash! Thanks for sharing.
Cheers,
David
mmm pizza…
Joe, I love your work and I love Nikon CLS. I have always been a little mystified by TTL when I have my camera in manual mode because I never know how hard my strobes are working. I appreciated your sharing of the metadata for the shot of Ali above. I noticed the Groups A & B (both in TTL) are at -1.0EV. I’m always trying to understand what my camera and flashes are during when I’m “auto” modes. Is there a way translate that data into flash power settings (Full, 1/2, 1/128 or whatever), so I can learn how hard my Nikon strobes are working or not working?
Thanks for the detailed “recipe.” Such a great way for the real numnuts like me to learn from the best.
Great work with the speedlights. I just purchased my first (SB-910), hoping to learn some good stuff with it. Posts like this certainly help!
And I am in agreement w/ Reed…definite resemblance there.
Great stuff, Joe.
Extremely nice work in what was probably a very hurried situation. One question: in the GPP photo, even though the back light was in manual at 1/128 power, did you take any extra steps to cut out flare? Looks like that light is coming straight into the lens. Looks like a bit of flare around the hat, but nothing crazy around the face and body, where it would cause the image to go as you say in technical terms: “kaflooey.” Thanks for these types of posts. I learn so much getting inside your mind on images like this.
Beautiful lighting. It’s all about the lights magic! Thanks Joe. You’re the best.
Tom
As always Joe, pulling great images out of thin air all whilst making it look effortless.
Your blog makes my week.
Cheers,
Analia
Thank you very very much for breaking this down in steps that I can follow. Very helpful and inspiring. Thanks, Joe for taking the time. See you next time in The Netherlands.
Lighting is simple but yet most evoking.
Awesome portraits Joe! I love how you can completely change a seen with a just a little subtle color and light angles. Plus you always seem to get the most out of your subjects as well!
Thanks Joe and thanks for the recent talk in Singapore – incredibly useful.
I’ve been in that audience many times and it’s always a blast to see the look on everyone’s face as you teach, wha a blessing!
speedlightking!!!! Greetings from Spain